Attaching the ADV1 to Your Bike & Locking It
The Vital Connection Point!
The connection between the ADV1 and your bike is key to the functionality of both the trailer and your bike while pulling it. It has to be solid, not allowing any wiggling, but it has to be able to rotate vertically. It has to be designed so it can’t be disconnected accidentally or through wear and tear. It has to work perfectly with a huge variety of ADV bikes. It has to be fast and easy to use, and yet secure.
In preparation for producing the beta versions of the ADV1, we have gone through a huge redesign of the ADV1’s hitch clamp, which is what we call the part of the ADV1 that grabs onto the axle adapter, running through the axle of the bike. See below for a better explanation…a picture is worth a thousand words (maybe 10,000 of my words)!
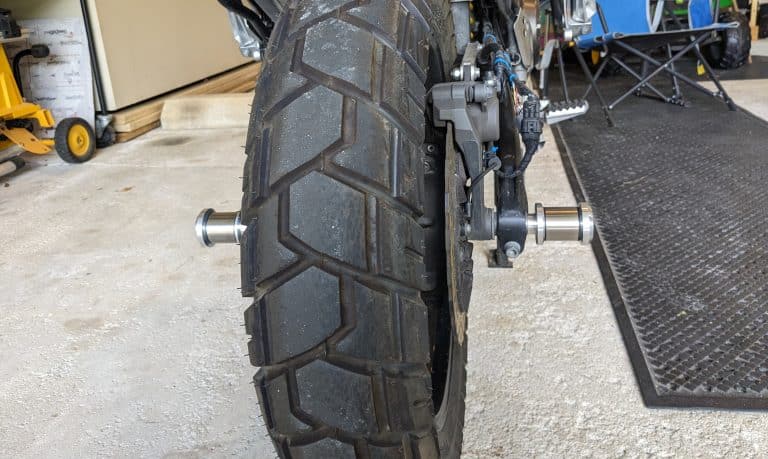
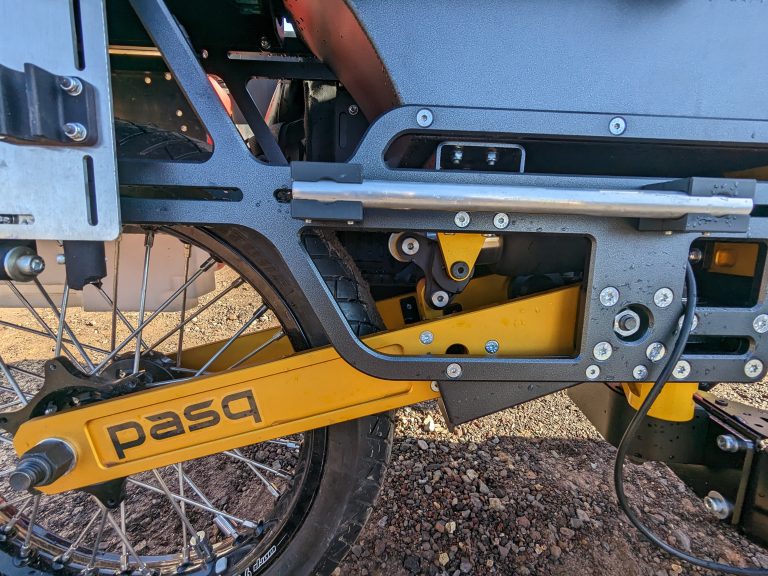
Here’s what it will look like, from the side, connected to a bike:
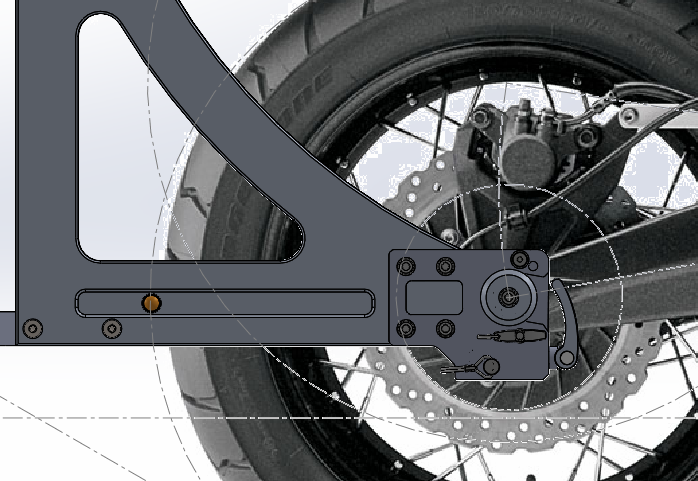
How Do You Attach the ADV1 to Your Bike?
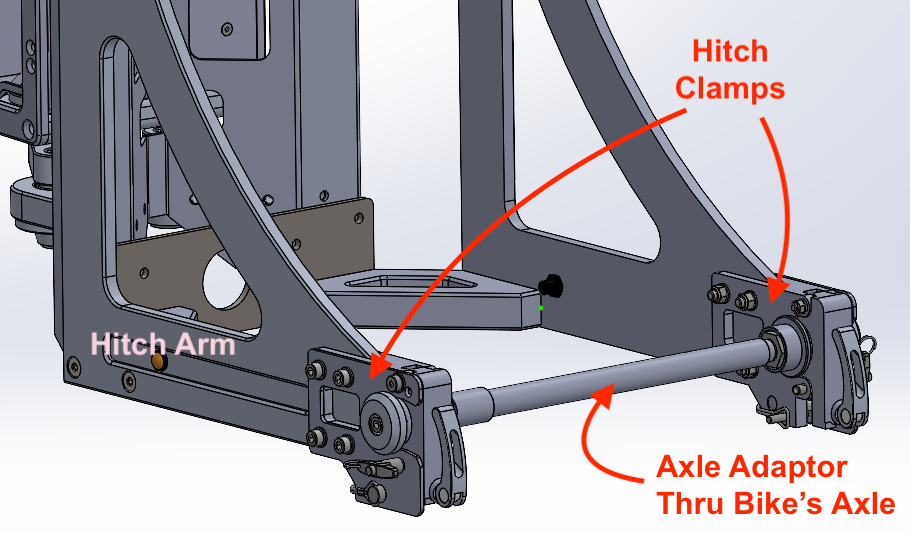
Below are CAD drawings of the final hitch clamp by itself. You will see there is a lot going on, but it’s actually simple, functional, and designed for safety.
Let’s start with a view of an open hitch clamp, as if you were about to attach the ADV1 to your bike.
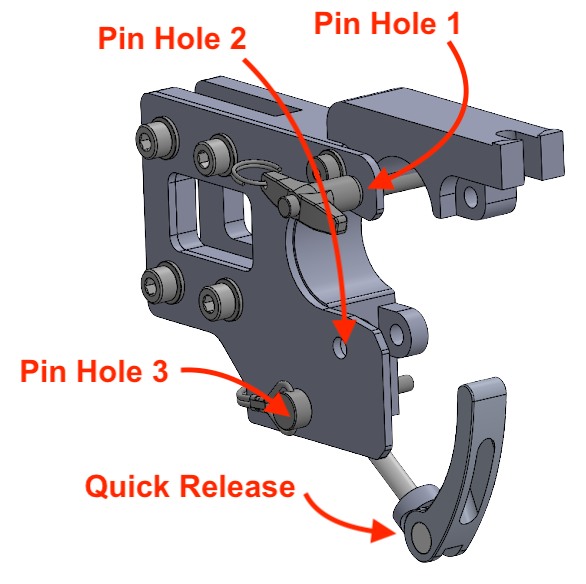
You’ll notice that a T-handle pin is in the top hole (hole #1) and not in hole #2. It’s in hole #1 for two reasons: 1) to hold open the clamp so you can easily slide the hitch clamp onto the axle adapter. 2) It’s also there so you don’t lose it when you’re attaching/detaching the ADV1.
You’ve also probably noticed the quick release lever. Like on a bicycle’s wheel or seat post, the quick release is there to cinch everything up easily, effectively, and…well, of course, quickly!
Lastly is the pin in hole #3; it’s there for two reasons: 1) It keeps the quick release from flopping around and getting in the way while you are attaching or detaching the ADV1, and 2) It’s a second failsafe to make sure the hitch clamp cannot open unless you want it to open. It’s not a t-handle so that it doesn’t stick out as far, so if the t-handle is clipped somehow, this flat-headed pin likely will not get caught on anything.
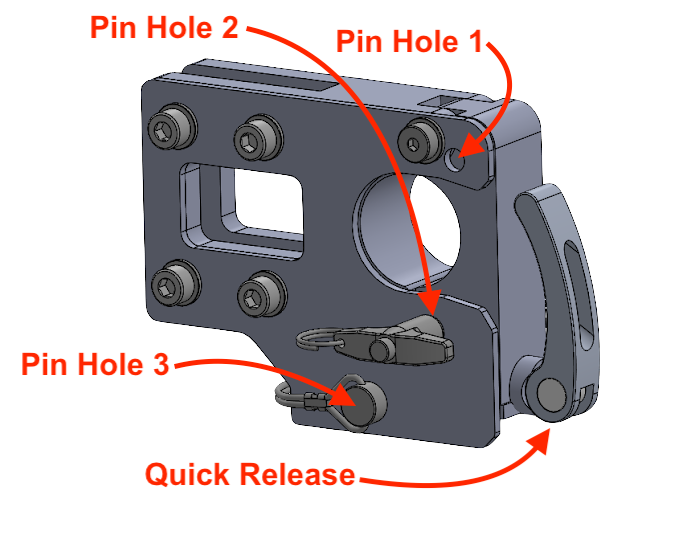
Once the clamp is closed and the quick release is cinched up and closed, you move the t-handle pin to hole #2. Putting a pin in a closed clamp is a safety check as well as security: if the hitch clamp is attached correctly, the pin will slide through hole #2 easily. If the pin won’t go through or it requires any force, it means something is wrong. Once the pin is in, it also acts to prevent the clamp from opening if the quick release were to fail for any reason.
The pin in hole #3 is yet another means of ensuring the clamp can’t open.
How Do You Lock the ADV1?
We don’t have one solution for locking the ADV1 to your bike, but we do have a lot of options!
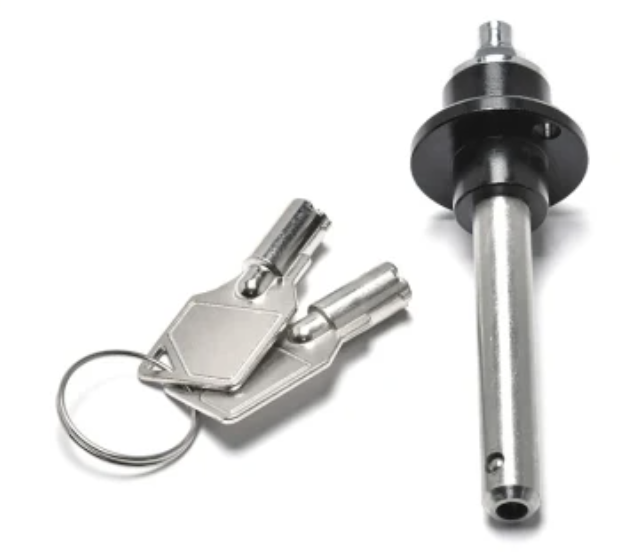
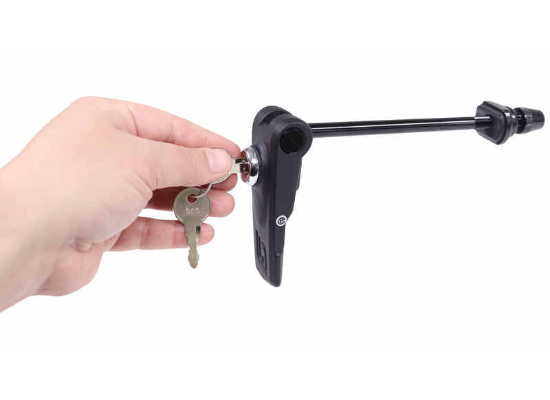
Option 1 – Lock it to the Bike Using a Keyed Locking Pin
You can buy a locking ball pin like what you see below. This would prevent the pin from being pulled out, so the clamp cannot be opened. We will be looking for a source of these that match our requirements.
Option 2 – Lock it to the Bike using a Keyed Quick Release
There are several ways of making the quick release lockable. We will be investigating this and hopefully providing you with this option as well.
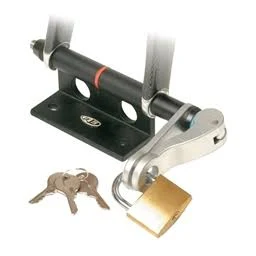
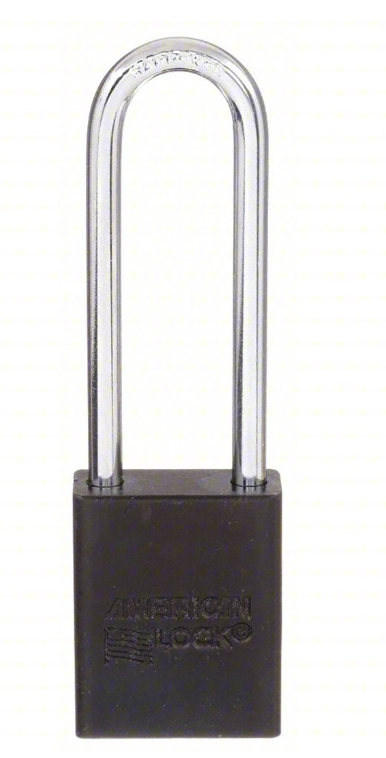
Option 3 – Lock it to the Bike by Putting a Lock Through Hole #3.
The pin holes are 8 mm (0.31 inches) in diameter, which means a standard ¼ inch paddle lock can be put through the hole to lock it and making it impossible to open the hinge clamp.
Option 4 – Lock the ADV1 to Something Else Using a Cable Lock


There are a multitude of cable lock options available to you. There will be several places you will be able to run a cable lock through the ADV1 and lock it to your bike (temporarily), light poles, trees, or whatever else you can find.
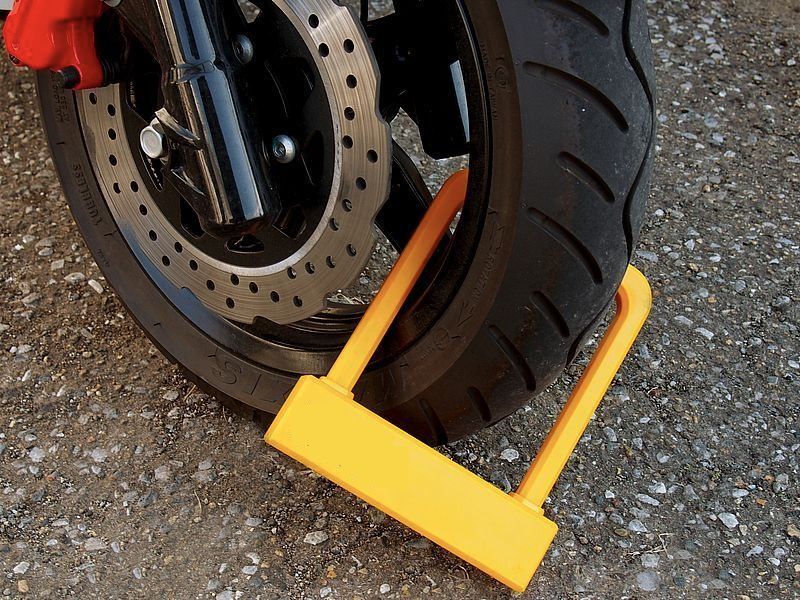
Option 5 – Make the ADV1 Harder to Move
You can use a conspicuous u-lock on the ADV1’s wheel to make it difficult to move the ADV1. You can use this in conjunction with any of options 1 to 4 as well, for double deterrence.
So, your ADV1 will not come with a set of keys…instead it will come with a lot of options for you on how you think it best to lock it.